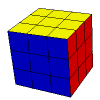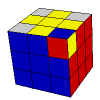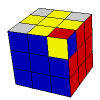
.png) |
Grey cubies show cubies that aren't important at this stage - just ignore them. |
There aren't many algorithms to achieve this as it relies mostly on logic, but there are some scenarios you can watch out for:
 |
R |  |
FR |  |
FRU |
It is also important to remember that the edge colours have to be aligned with the centers like this:


and not like this:

The next step is to put the corners in, like this:

Just like the edge pieces before, it is important that the corner pieces match with the pieces around it, i.e. not like this:

The corners will most likely be on the bottom layer. It is important to first put the cubie you wish to move underneath where it needs to go. That is, the white-blue-red cubie should be underneath the white-blue-red corner. There is an algorithm for each situation:
 |
F D F' |  |
R' D' R |  |
R' D R F D2 F' (The white sticker on the corner is on the bottom.) |
In some cases, the corner will be on the top layer but just needs reorienting or repositioning, for example:
 |
R' D R F D F' The last three moves are from before - the cubie just had to put in the proper place first. |
If a corner cubie is in the top layer but in the wrong place, it also needs to be taken down to the bottom layer. This can be done with either of the following algorithms:
 |
F D' F' or R' D R |
Once the cubie as on the bottom layer, it can be put it in the correct place by using the above algorithms. When you can, always try to use one of the first two instead of the third as they are shorter and will save you time.
The next step is to put the four second layer pieces in the right place, like this:

The first thing to do is to turn the cube upside-down, so you have this:

Then find the piece that you need to put in the correct place - in this case the blue and red edge piece. You need to get to one of two situations:
 |
or |  |
To put the piece in the correct place, you need one of two algorithms, and one is the inverse of the other. These are the longest algorithms you'll need to learn.
 |
U R U' R' U' F' U F |  |
U' L' U L U F U' F' |
Sometimes, the second layer is sneaky and will throw this sort of situation at you:

Here, none of the second layer pieces are in the right places but you can't get to one of the above situations. To fix this, just do the algorithm anyway. In the above picture, using the first algorithm on the yellow-red edge piece will displace the orange-green piece, like so:

Now that the orange-green piece is in the top layer, you can solve it like normal.
Sometimes, you may meet this situation:

You can solve this in the same way as before, by using the normal algorithm on a yellow edge piece and displacing the red-blue piece so it can be solved as normal. Or, if you're feeling clever, you can show it who's boss and give it a bit of the old R U' R' U F' U2 F U F' U2 F.
There will be times where there is a piece where another piece needs to go, like this:

Don't be tempted to remove this piece in order to put it in the right place, as that takes time. Instead, put the red and blue piece there like normal and this will displace the foreign piece. This way, the algorithm only needs to be done once and not twice. The foreign piece can then be put in its correct place like normal.
As the name suggests, this stage comprises of creating a cross on the last layer, like this:

This can't be done in the same way as the first cross, so there are two small algorithms to learn.
There are four combinations you may have on the last layer to begin with and the two algorithms will cycle through these combinations in the order given.
 |
→ |  |
→ |  |
→ |  |
The two algorithms will cycle through these combinations in the order given. However, one of these algorithms will move one step in the cycle and the other will move two. These algorithms are:
F R U R' U' F' for one step
and
F U R U' R' F' for two steps.
As you can see, they are quite similar and small so they are quite easy to remember. Remember, when you get to the L shape it must be held in the top left of the face and the line must be held horizontally (as shown in the pictures).
For your ease, I have provided a table to show which algorithm to use at each situation:
 |
Use both, in either order. |
 |
F U R U' R' F' |
 |
F U R U' R' F' |


This step alters the corners so they are all in the right place, but not necessarily in the right orientation, like this:
 |
This is just an example - your corners may be in a different orientation once you've done this. |
First thing to do is to examine your cube and see if there are any corners that are already in the right place, e.g. the red, blue and yellow one in the picture above. It's in the right place, just not the right way around. If there are, make sure you hold it in the bottom right corner of the top face when you apply the algorithm - but don't move the top layer, move the whole cube to put it there. If there aren't any correct, you can apply the algorithm when the cube is held in any way (yellow face on top of course).
The algorithm is this:
U R U' L' U R' U' L
Some people (including myself) prefer to think of this as the top face, the right side away, the top face back again, the left side away, top side back again, right side towards, top side back again, left side towards. After the algorithm, the corner cubies (except the one in the bottom right - your possibly correct one) will have changed around. If they still aren't all correct, keep applying the algorithm until it is. If you started with one correct, you'll only have to do this algorithm twice. If you didn't, it may take more.
This is the last step, so will result in the completed cube:


I advise that you read through this section completely before attempting it. If you mess it up, you'll ruin everything, become sad and frustrated, and have to start all over again.
There is only one algorithm for this section:
R' D' R D (Reminder - it is important that the turns are done as if you were looking directly at the face! Don't let the Ds catch you out!)
This algorithm gets applied to each incorrectly oriented cubie, a number of times. If you don't have any, congratulations! You've solved the Magic Cube. But if you do, read on.
You must hold any incorrect cubie in the bottom right of the up face (the Red-Blue-Yellow corner in the above picture, as Blue is the front). Then keep applying the algorithm until the yellow is pointing upwards. You will either need to do it two or four times:
 |
Do the algorithm twice. |
 |
Do the algorithm four times. |
Once the two or four algorithms are completed, twist only the top face until another incorrectly oriented cubie is in the bottom right of the top face and do the algorithms again on that incorrect cubie.
Whilst you are doing these algorithms, the bottom two layers of the cube may become a jumbled mess. Worry not! They are sensible, and will resolve themselves once you have finished the algorithms on the last incorrect cubie.
Once these algorithms are complete, you are only one or two turns away from completing the Magic Cube.
Congratulations!
-- SOURCE: www.solve-the-cube.com
Top of page